Picklz
SUDO Make me a SAMCH
I was going to post some of this on another forum so I figured I may as well stick it here as well for the 8 people still around LOL.
The wife and I ended up buying a new house in Lino Lakes this June, it has a 3 car attached garage but also has an 18'x28' insulated / heated (via a wood burning stove) workshop in the back yard which is going to be my general car / project workshop and build location for the mustang we're planning to race in chump car and possibly WRL. Now that we're somewhat moved in and getting settled I've turned my attention to customizing the workshop to my liking. I'm fairly terrible at taking 'before' and 'in progress' pictures so the only real before picture I have is from the MLS listing -
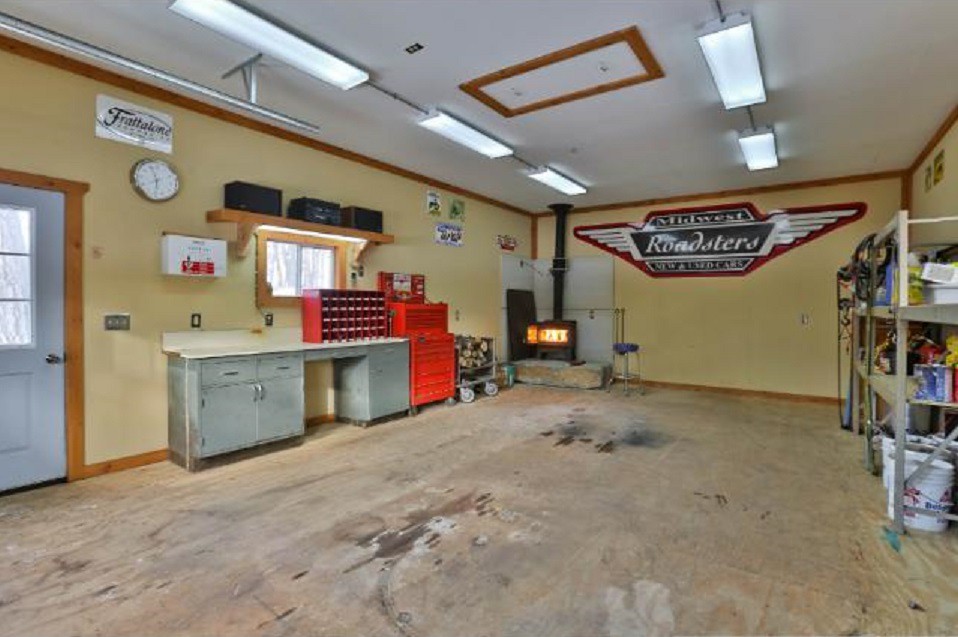
Unfortunately the cool signs were removed, but the steel cabinets / workbench on the left and shelving on the right stayed which was great. Those cabinets were in pretty rough shape, lots of rust and paint looked pretty terrible and the top was an old formica counter top that was pretty beat up. I decided to put my two rolling 44" HF tool chests next to the steel cabinets. Just so happened they were pretty close to the same height as those cabinets with the wheels off and I never really move them around so I decided to build a new workbench over the whole works. This would give me a bench that is almost 16' long which sounded excellent. As long as I was removing the old top and moving things around a little bit I figured it made sense to paint those old steel cabinets as well. Found out they are made by Maysteel in Wisconsin, pretty heavy duty medical cabinets from the looks of it. I sanded them all down and shot them with rattle can rustoleum, far from a show quality paint job but a vast improvement over what they were.
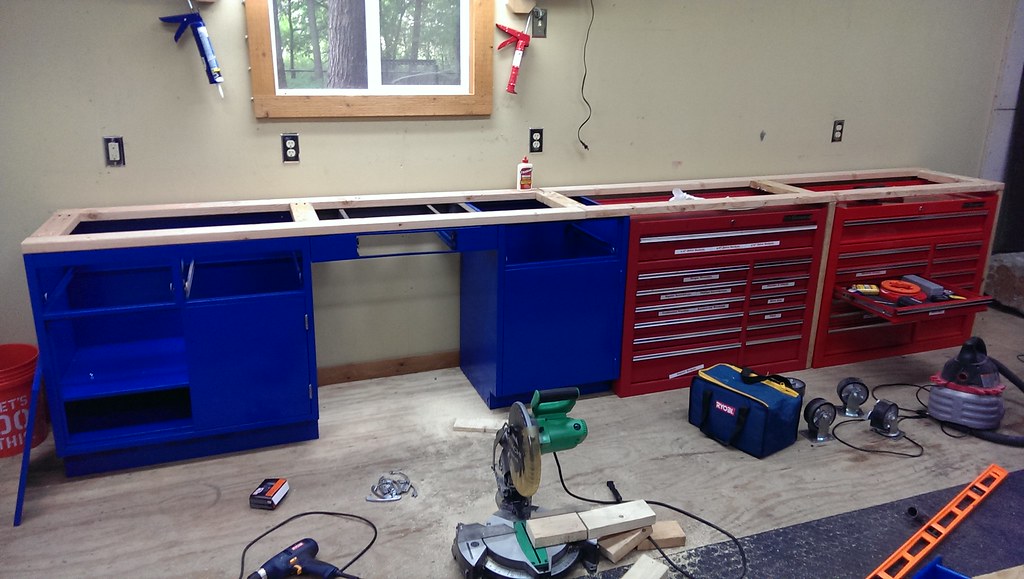
Again not a lot of in progress shots but here's the boxes in place, cabinets painted and a 2x4 frame over the works, I used a kreg jig to make the pocket holes to screw all the supports together and glued everything as well, the bench top is supported by the steel cabinets on the left and then a couple pairs of legs on the right over the HF Boxes. I also screwed the top down to the steel cabinets with wood screws from inside the cabinets. I choose to lay the 2x4's flat as I wanted to keep the overall height a little lower, and it allowed me to better position everything to mount to the steel cabinets. I'm not at all worried about their strength in that configuration with this particular setup.
I got a killer deal on about 9 sheets of plywood from Craigslist ranging from 1/4" to 3/4" thick for $75 so I went with a 3/4" plywood top over the 2x4 frame. I thought about just doing some stain and poly over that and calling it good, but I came across a killer deal on about 70 square feet of solid bamboo flooring someone was getting rid of for $35. Bamboo workbench? why not! I fastened the plywood down to the 2x4's and started laying out the bamboo:
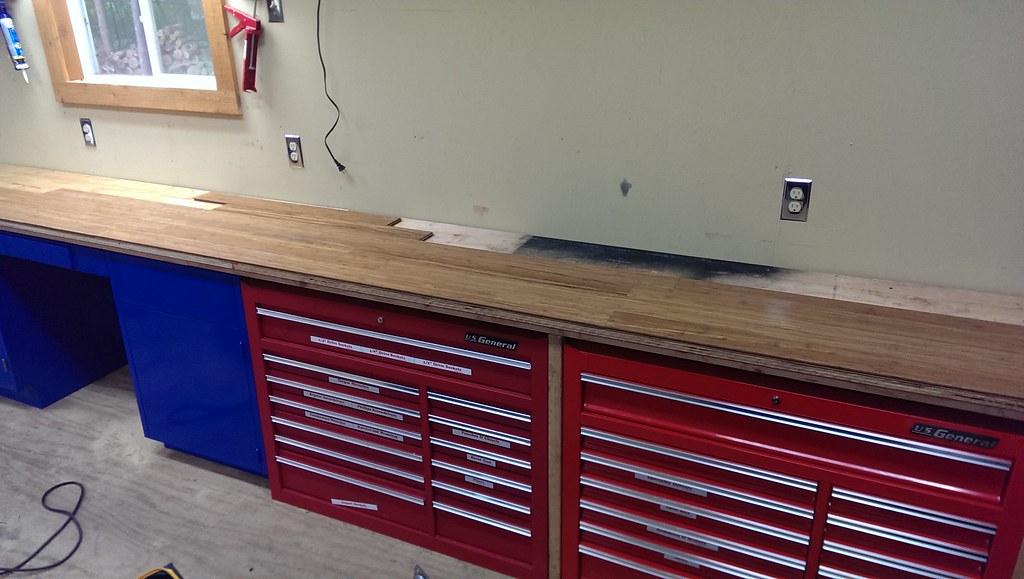
I decided to cut the first (front) row at a 45 and cut another 45 to wrap the front/sides with to give it a nice finished look. I've not really done much woodworking since high school so it's far from perfect, but for a garage / workbench it turned out pretty damn nice. I glued/nailed the very first row and the front trim boards and then left the rest of the boards free-floating, it extends back to within about 1/4" or so of the back wall to allow for expansion. So far it seems to stay put and not move around at all so if that remains the case I'll leave it as is. If it decides to shift at all I may have to pop a couple nails in the back row to keep everything secure.
BOOM Top Done!
In my excitement over how things were coming together, I forgot to cut a pass through in the front trim board for the two drawers that are overlapped on the left side steel cabinets, DOH. Going to have to figure out how to do that after the fact now.
I'm planning on using some polyurethane on a test piece of the bamboo to see how it reacts and looks. If it seems like it'll work out okay i plan to do a couple coats of poly over the whole bench top to help keep it looking good. I have an old desk mat and one of the rubber mats that was on top of the harbor freight toolbox that I set on top of the bench as work mats to protect the surface. At the end of the day though if it gets scratched up NBD, it's a garage, and I have extra that I can replace some pieces with if needed also.
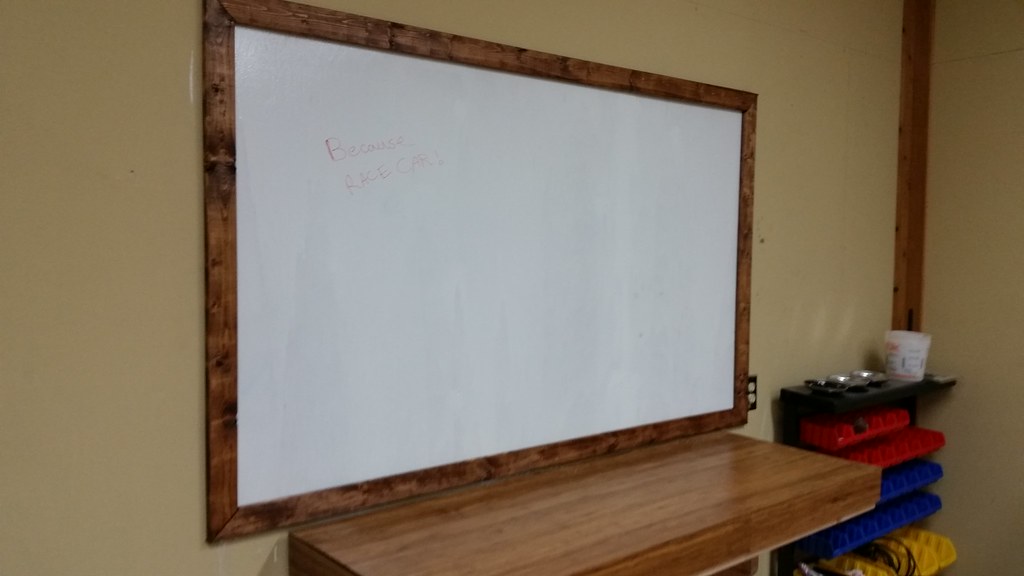
With the workbench in place I mounted the cabinets I brought over from the old place over the right side, and installed my retractable trouble light right next to them. I plan to wall mount a 20" LCD under the center cabinet on the wall, and I have a PC I'll be putting out there for playing music, looking up technical information, etc.
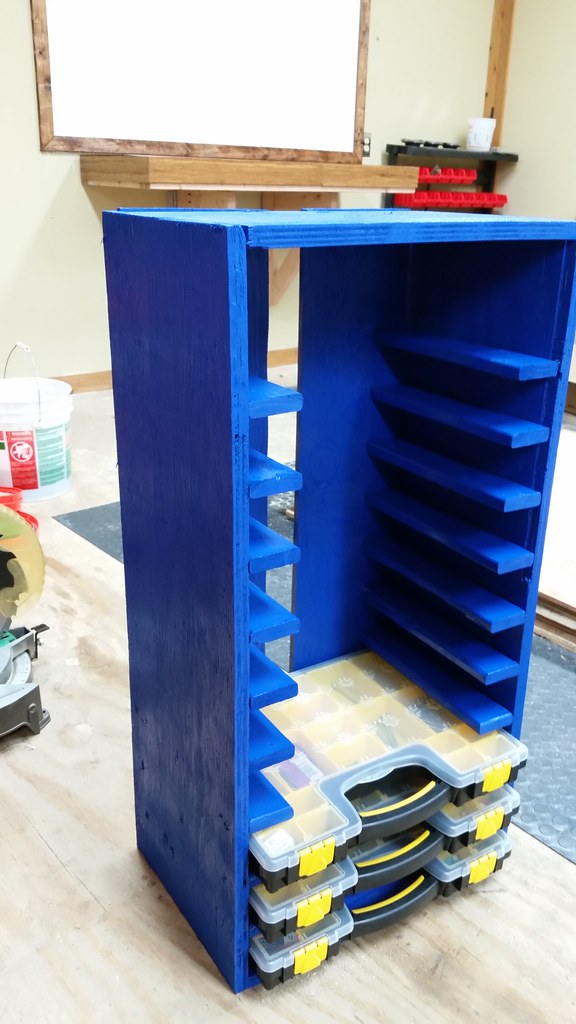
I picked up a free standing parts bin storage jobbie from harbor freight for storing loose parts from projects and such - it was on sale fairly cheap and I stacked a 20% coupon on top of that. It's not the greatest built item I've ever seen but once assembled is fairly stable and should work just fine. I've got a plan in the works for more parts storage above it that I'll hopefully get to soon, and a 5' folding workbench is going to live next to it on the left which I'll hopefully get to finishing tonight:
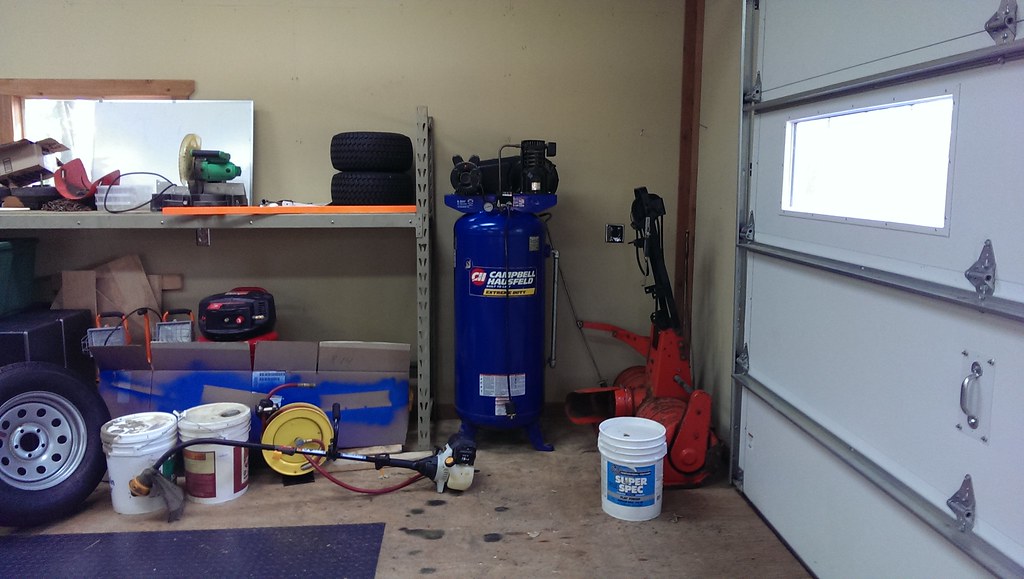
Being we're going to be doing a fair amount of auto work in this garage, my little husky compressor wasn't really going to cut it, back to Craigslist as I didn't really have money for a brand new compressor and I found this 60 gallon 220volt CH compressor for a helluva deal so I went and picked it up. Seems to work great other than the included regulator has a leak. Going to see if I can fix that and if not will have to grab a replacement. I also grabbed a rapid air plumbing kit from Northern Tool as they had them on sale, that'll be a project for the near future. I already had a nice retractable air hose reel that'll get mounted on one end of the garage, and then I plan to have a coiled hose at the work bench as well. The hose reel in the picture actually came with the compressor, mine is nicer so I'm going to use the 'free' one in the attached garage along with my smaller husky compressor for filling tires and such.
Along with the aforementioned folding workbench, parts storage, and compressor plumbing projects I am going to work on getting the floor finished - it's a plywood floor so I wanted to do something to help protect it from fluid spills and such, I put down a 17.5' x 7.5' rubber mat that I picked up at Menards fairly cheap in the center, and will be using the knock-off racedeck flooring I had at my old place to go around that. I have quite a few other little projects I'd like to get to also but we'll see how things go. I'll update when I get more done and try and take some better pictures as well.
The wife and I ended up buying a new house in Lino Lakes this June, it has a 3 car attached garage but also has an 18'x28' insulated / heated (via a wood burning stove) workshop in the back yard which is going to be my general car / project workshop and build location for the mustang we're planning to race in chump car and possibly WRL. Now that we're somewhat moved in and getting settled I've turned my attention to customizing the workshop to my liking. I'm fairly terrible at taking 'before' and 'in progress' pictures so the only real before picture I have is from the MLS listing -
Unfortunately the cool signs were removed, but the steel cabinets / workbench on the left and shelving on the right stayed which was great. Those cabinets were in pretty rough shape, lots of rust and paint looked pretty terrible and the top was an old formica counter top that was pretty beat up. I decided to put my two rolling 44" HF tool chests next to the steel cabinets. Just so happened they were pretty close to the same height as those cabinets with the wheels off and I never really move them around so I decided to build a new workbench over the whole works. This would give me a bench that is almost 16' long which sounded excellent. As long as I was removing the old top and moving things around a little bit I figured it made sense to paint those old steel cabinets as well. Found out they are made by Maysteel in Wisconsin, pretty heavy duty medical cabinets from the looks of it. I sanded them all down and shot them with rattle can rustoleum, far from a show quality paint job but a vast improvement over what they were.
Again not a lot of in progress shots but here's the boxes in place, cabinets painted and a 2x4 frame over the works, I used a kreg jig to make the pocket holes to screw all the supports together and glued everything as well, the bench top is supported by the steel cabinets on the left and then a couple pairs of legs on the right over the HF Boxes. I also screwed the top down to the steel cabinets with wood screws from inside the cabinets. I choose to lay the 2x4's flat as I wanted to keep the overall height a little lower, and it allowed me to better position everything to mount to the steel cabinets. I'm not at all worried about their strength in that configuration with this particular setup.
I got a killer deal on about 9 sheets of plywood from Craigslist ranging from 1/4" to 3/4" thick for $75 so I went with a 3/4" plywood top over the 2x4 frame. I thought about just doing some stain and poly over that and calling it good, but I came across a killer deal on about 70 square feet of solid bamboo flooring someone was getting rid of for $35. Bamboo workbench? why not! I fastened the plywood down to the 2x4's and started laying out the bamboo:
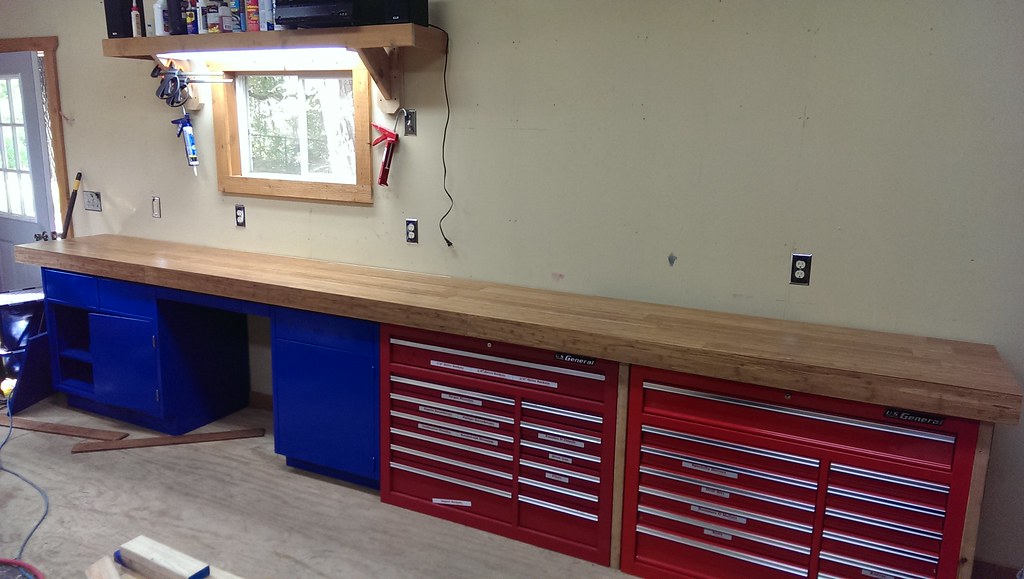
I decided to cut the first (front) row at a 45 and cut another 45 to wrap the front/sides with to give it a nice finished look. I've not really done much woodworking since high school so it's far from perfect, but for a garage / workbench it turned out pretty damn nice. I glued/nailed the very first row and the front trim boards and then left the rest of the boards free-floating, it extends back to within about 1/4" or so of the back wall to allow for expansion. So far it seems to stay put and not move around at all so if that remains the case I'll leave it as is. If it decides to shift at all I may have to pop a couple nails in the back row to keep everything secure.
BOOM Top Done!
In my excitement over how things were coming together, I forgot to cut a pass through in the front trim board for the two drawers that are overlapped on the left side steel cabinets, DOH. Going to have to figure out how to do that after the fact now.
I'm planning on using some polyurethane on a test piece of the bamboo to see how it reacts and looks. If it seems like it'll work out okay i plan to do a couple coats of poly over the whole bench top to help keep it looking good. I have an old desk mat and one of the rubber mats that was on top of the harbor freight toolbox that I set on top of the bench as work mats to protect the surface. At the end of the day though if it gets scratched up NBD, it's a garage, and I have extra that I can replace some pieces with if needed also.
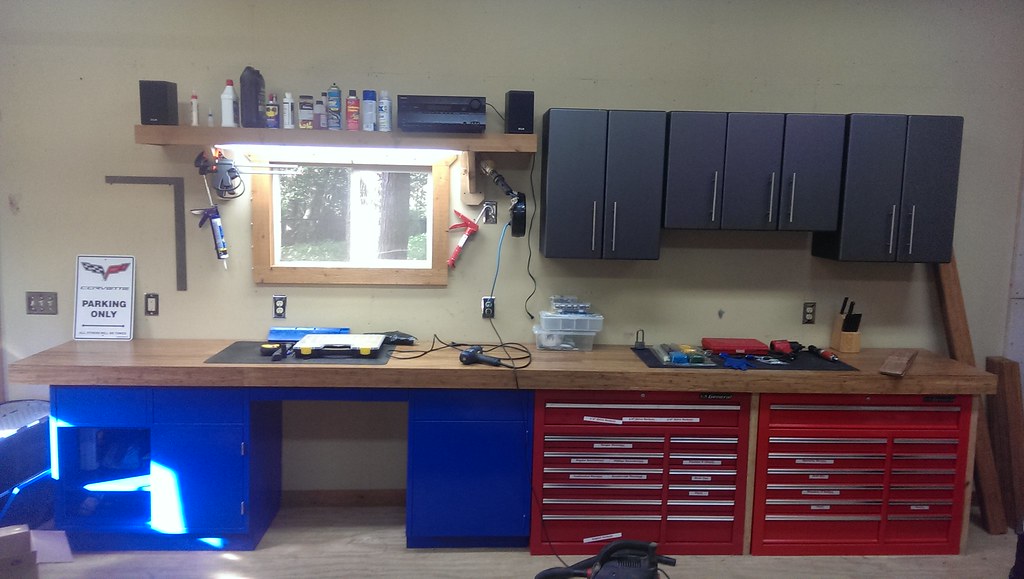
With the workbench in place I mounted the cabinets I brought over from the old place over the right side, and installed my retractable trouble light right next to them. I plan to wall mount a 20" LCD under the center cabinet on the wall, and I have a PC I'll be putting out there for playing music, looking up technical information, etc.
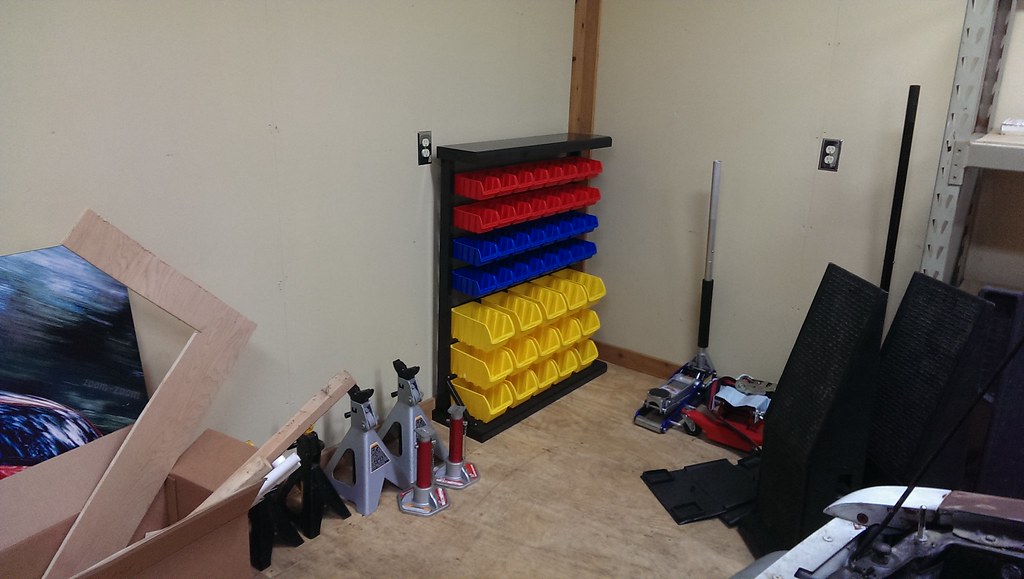
I picked up a free standing parts bin storage jobbie from harbor freight for storing loose parts from projects and such - it was on sale fairly cheap and I stacked a 20% coupon on top of that. It's not the greatest built item I've ever seen but once assembled is fairly stable and should work just fine. I've got a plan in the works for more parts storage above it that I'll hopefully get to soon, and a 5' folding workbench is going to live next to it on the left which I'll hopefully get to finishing tonight:
Being we're going to be doing a fair amount of auto work in this garage, my little husky compressor wasn't really going to cut it, back to Craigslist as I didn't really have money for a brand new compressor and I found this 60 gallon 220volt CH compressor for a helluva deal so I went and picked it up. Seems to work great other than the included regulator has a leak. Going to see if I can fix that and if not will have to grab a replacement. I also grabbed a rapid air plumbing kit from Northern Tool as they had them on sale, that'll be a project for the near future. I already had a nice retractable air hose reel that'll get mounted on one end of the garage, and then I plan to have a coiled hose at the work bench as well. The hose reel in the picture actually came with the compressor, mine is nicer so I'm going to use the 'free' one in the attached garage along with my smaller husky compressor for filling tires and such.
Along with the aforementioned folding workbench, parts storage, and compressor plumbing projects I am going to work on getting the floor finished - it's a plywood floor so I wanted to do something to help protect it from fluid spills and such, I put down a 17.5' x 7.5' rubber mat that I picked up at Menards fairly cheap in the center, and will be using the knock-off racedeck flooring I had at my old place to go around that. I have quite a few other little projects I'd like to get to also but we'll see how things go. I'll update when I get more done and try and take some better pictures as well.